This is a quick post detailing a process for making a diy screw extractor. This works best for extracting broken screws that have broken off too deep in the wood to use a traditional screw extractor. I picked up this technique from a post by Doug and Sharon Proper aka The Guitar Specialist Inc. You can find them on Instagram here and visit their website here, they are truly admirable figures in this field and are a no brainer of a follow.
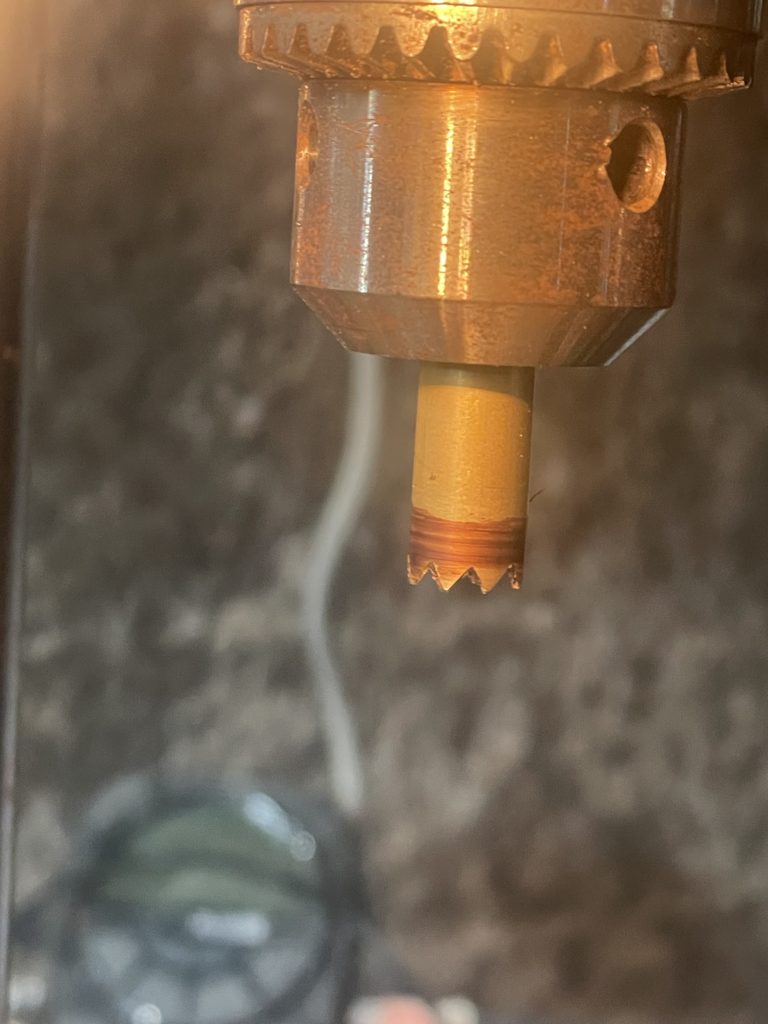
The general procedure is to take a piece of brass tube stock that is just larger than the outer diameter of the threads and file some teeth around one end (in this case I had to go quite a bit larger because there was extra damage from a previous, unsuccessful extraction attempt). You can use steel too if you’d like a cutter that lasts longer, but I vastly prefer filing brass since it’s so much softer.
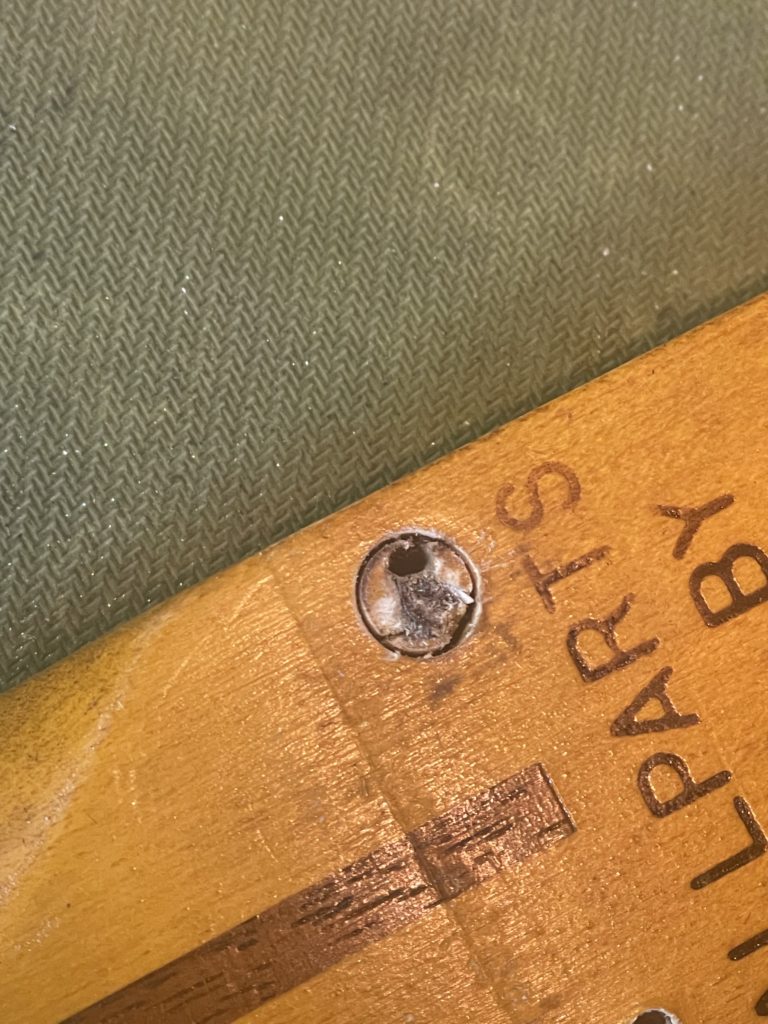
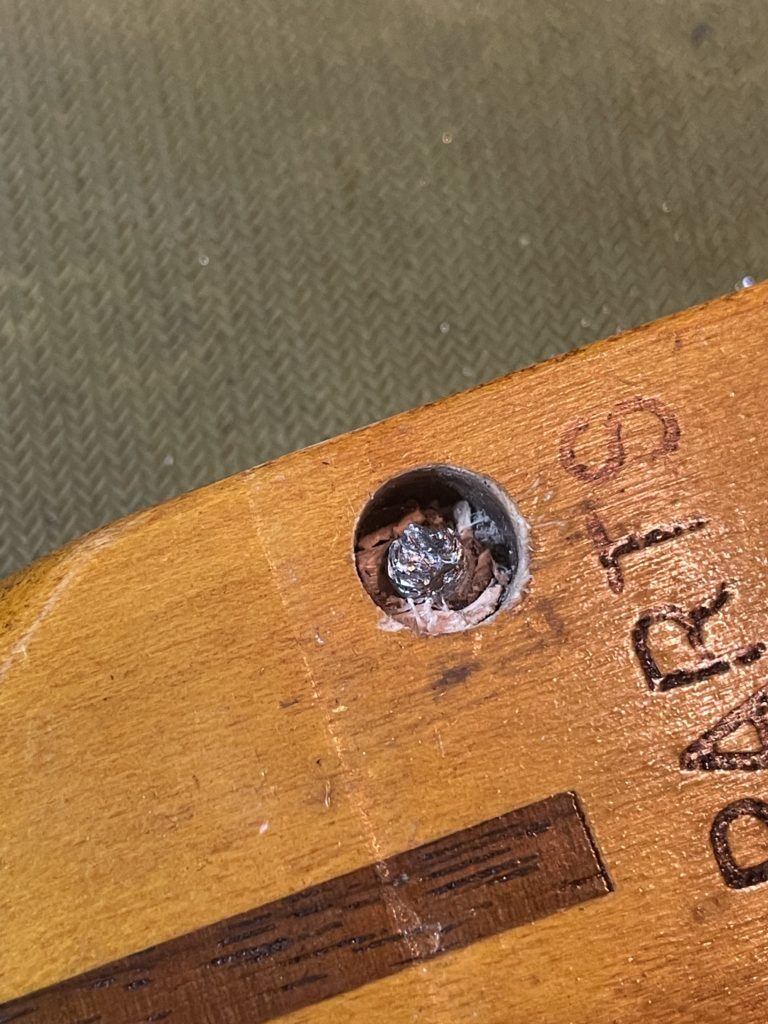
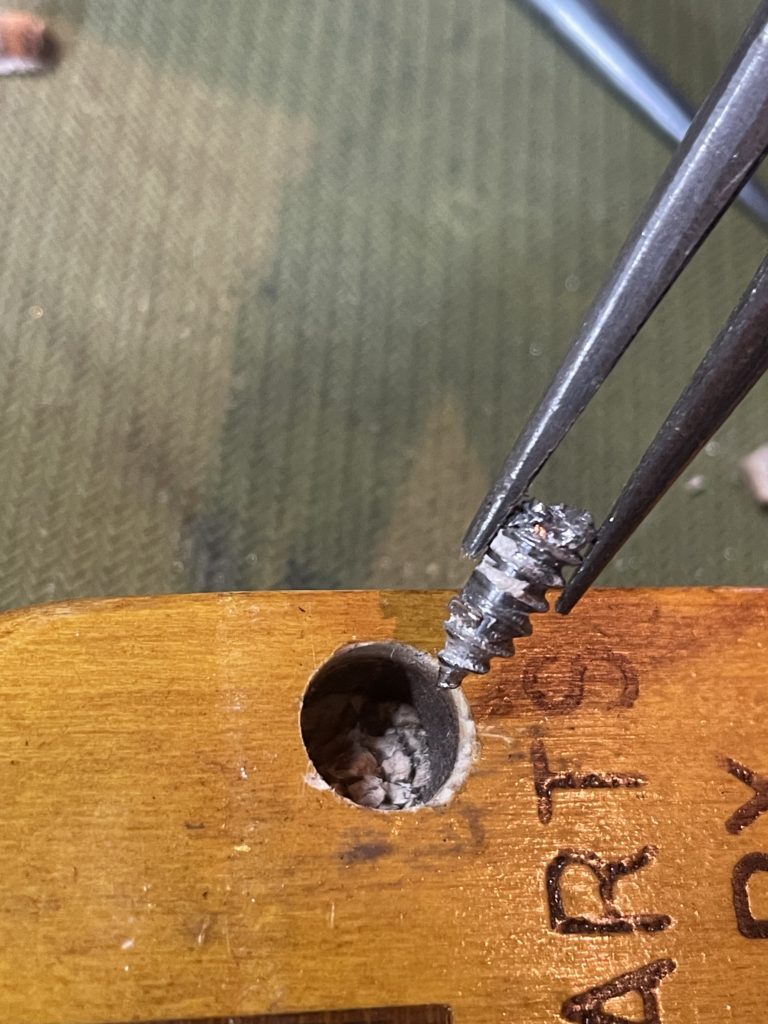
I will then tap in a dowel slightly larger than the inner diameter of the tube so that the drill chuck has something to press against, avoiding damage to the cutter. If you make these out of steel, it’s not as much of a concern, but since the brass is so soft, it deforms relatively easily. Once it’s chucked into the drill press, I’ll set a depth stop to avoid blowing completely through the other side of the damaged area and then center the cutter around the screw. I’ll check my progress after a few cuts to see if I can get the screw to release. In this case, I had enough room around the threads to excavate the damaged wood with a micro chisel to make removal easier as I don’t want to remove more material than is necessary.
I unfortunately did not capture photos of the finished project after filling the hole, but I cut and glued in a dowel of matching diameter and grain orientation and then mounted the neck with the remaining three screws to locate the new screw hole location, drilled it out, and was back in business!
It’s worth noting that this is almost entirely avoidable if you do most or (preferably) all of these three things: 1. Use stainless screws 2. Pre-drill all holes to the proper diameter 3. Wax the threads to give the threads a better chance to slide through the wood.
Thanks for reading! You can check out my other repair posts here or give me a ring here if you don’t want to have to make your own diy screw extractor, I’m happy to do it for you :).